
NodeBox for OpenGL
NodeBox for OpenGL is a free, cross-platform library for generating 2D animations with Python programming code. It is built on Pyglet and adopts the drawing API from NodeBox for Mac OS X (http://nodebox.net). It has built-in support for paths, layers, motion tweening, hardware-accelerated image effects, simple physics and interactivity.
 |
 |
NodeBox for OpenGL 1.7 | download (5MB) |
Documentation |
Core extensionsBuilt-in tools for matrix transformations, GLSL shaders, particle systems, graphs, GUI controls, PureData. |
Contributing |
Introduction
NodeBox for OpenGL is a free, cross-platform library for generating 2D animations with Python programming code. It is built on Pyglet and adopts the drawing API from NodeBox for Mac OS X (http://nodebox.net). It has built-in support for paths, layers, motion tweening, hardware-accelerated image effects, simple physics and interactivity.
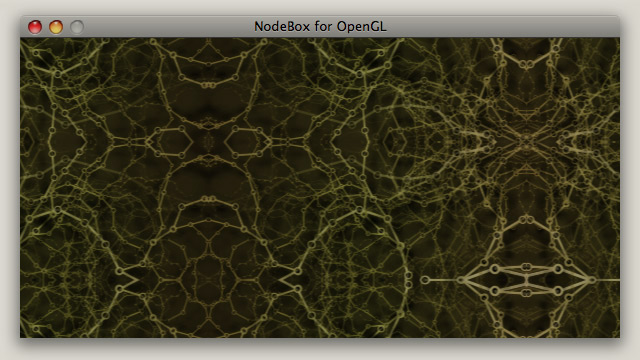
Screenshot: examples/07-filter/03-mirror.py
Quick overview
You'll need a 32-bit Python (version 2.5 or 2.6) and Pyglet to run it. NodeBox for OpenGL does not have a built-in code editor. You can use the IDLE editor bundled with Python. On Mac OS X, we prefer TextMate.
The documentation is concise. Users are assumed to have knowledge of Python (functions & classes) and NodeBox (the original docs are more verbose). The documentation works in conjunction with the examples folder: subjects are touched here and demonstrated in more detail across various examples.
From the command line, you can run a script with: python example.py (or command-R in TextMate).
This will open an application window with the output of your script.
To get started, try out some examples, or open and edit examples/test.py.
Below is a typical NodeBox script. It imports the nodebox.graphics module with the standard set of drawing commands. It defines a draw() function and attaches it to the canvas, so that it will be drawn each animation frame. It opens the main application window with canvas.run().
from nodebox.graphics import *
from nodebox.graphics.physics import Flock

flock = Flock(40, 0, 0, 500, 500)
flock.sight = 300

def draw(canvas):
    background(1)
    fill(0, 0.75)
    flock.update(cohesion=0.15)
    for boid in flock:
        push()
        translate(boid.x, boid.y)
        scale(0.5 + 1.5 * boid.depth)
        rotate(boid.heading)
        arrow(0, 0, 15)
        pop()

canvas.fps = 30
canvas.size = 600, 400
canvas.run(draw)
Purpose
The original goal is to implement a small game engine for City In A Bottle. NodeBox for OpenGL can be used for simple games, interactive media installations, data visualization and image compositing. It's not as fast as anything in native C, but quite a bit faster than the classic NodeBox.
Acknowledgements
This version of NodeBox for OpenGL has been developed by the City In A Bottle team, with funding support from the Flemish Audiovisual Fund (VAF). We also credit Lucas Nijs and the Experimental Media Group at Sint Lucas Antwerpen, and Walter Daelemans and the Computational Linguistics Research Group at CLiPS, University of Antwerp for valuable input and support. The documentation was established as part of an artistic research project for the Interuniversity Microelectronics Centre (IMEC), Leuven.
- Author: Tom De Smedt
- Contributing authors: Frederik De Bleser, Giorgio Olivero, Lieven Menschaert
- Contributors: Karsten Wolf, Tuk Bredsdorff.
- City In A Bottle: Nicolas Marinus, Ludivine Lechat, Tim Vets, Frederik De Bleser, Tom De Smedt.
Reference
De Smedt T., Lechat L., Daelemans W. (2011). Generative art inspired by nature, in NodeBox. In: Applications of Evolutionary Computation, Part II, LCNS 6625, pp. 264-272, Springer.
Installation
NodeBox for OpenGL is built on the excellent Pyglet module. It works on all platforms if you have Python and Pyglet installed. Installers can be obtained from:
- Python 2.5 or 2.6: http://www.python.org/download/
- Pyglet 1.4+: http://www.pyglet.org/
On Mac OS X, Python is already installed. This is fine for Mac OS X 10.5, on 10.6+ (Snow Leopard) this is a 64-bit Python and you either need to install a 32-bit version (better Pyglet + Pysco support), or switch the current version to 32-bit mode by executing the following command from the terminal (more info here):
defaults write com.apple.versioner.python Prefer-32-Bit -bool yes
GNU/Linux users can use their package management system to install Pyglet.
Ubuntu: sudo apt-get install python-pyglet
Fedora: sudo yum install pyglet
Your video hardware needs to support OpenGL 2.0.
NodeBox may not (fully) work on older hardware. Telltale signs are:
- Using image filters only works with non-transparent images.
- Using image filters produces no visible effect, and nodebox.graphics.shader.SUPPORTED is False.
- Using the render() or filter() command throws an OffscreenBufferError.
Compiling the C extensions
NodeBox comes bundled with a number of C extensions that increase performance. Binaries have been precompiled for Mac OS X 10.5, but these may not work on your machine. Although it is not required (everything will run fine without the extensions), you can compile binaries manually from the source code.
In the nodebox/ext/ folder, execute setup.py from the command line:
> cd nodebox/ext/
> python setup.py
In the nodebox/ext/psyco/src/ folder, execute setup.py from the command line:
> cd nodebox/ext/psyco/src
> python setup.py
Installing the module
If you have pip, you can simply do:
> pip install nodebox-opengl
Otherwise, you need to place the nodebox folder from the download in the correct location manually. To be able to import NodeBox in your scripts, Python needs to know where the module is located. There are three basic ways to accomplish this:
- Put the nodebox folder in the same folder as your script.
- Put the nodebox folder in the standard location for modules so it is available to all scripts.
The standard location depends on your operating system:
/Library/Python/2.5/site-packages/ on Mac,
/usr/lib/python2.5/site-packages/ on Unix,
c:\python25\Lib\site-packages\ on Windows. - Add the location of the nodebox folder to the sys.path list in your script, before importing it:
NODEBOX = '/users/tom/desktop/nodebox'
import sys; if NODEBOX not in sys.path: sys.path.insert(0, NODEBOX)
from nodebox.graphics import *
If you get an "import pyglet" error, ensure that Pyglet is installed in site-packages/ too.
Screencasts
Here are a number of screencasts to help you get through the installation procedures.
Coordinate system
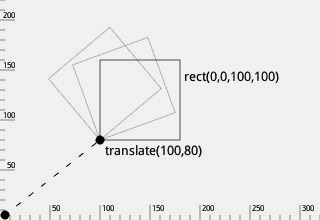
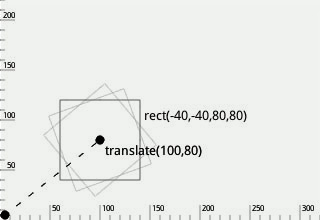
By, default, the 2D drawing canvas origin (0,0) is located in the lower left. The origin can be moved (or translated) with the translate() command, where positive numbers define the amount of pixels to move right and up.
 |
|
 |
|
Color
The Color object can be used to store a color in terms of R,G,B,A channel values. It can be passed to background(), fill() and stroke() to set the current drawing color for primitives.
A color can be initialized with either four values (R,G,B,A), three values (R,G,B), two values (grayscale + alpha) or one value (grayscale, or another Color object). An optional base parameter defines the range of the given values (e.g. 0-255 instead of 0.0-1.0). An optional colorspace defines the color space of the given parameters (e.g. when set to HSB, the given values are expected to be hue, saturation, brightness, alpha instead of red, green, blue, alpha).
clr = Color(r, g, b, a, base=1.0, colorspace=RGB)
clr = Color(r, g, b, base=1.0, colorspace=RGB)
clr = Color(grayscale, a, base=1.0, colorspace=RGB)
clr = Color(grayscale, base=1.0, colorspace=RGB)
clr = Color(clr, base=1.0, colorspace=RGB) # Colorspace: RGB, HSB, XYZ, LAB.
clr.rgba                                   # Tuple of (R,G,B,A)-values.
clr.rgb                                    # Tuple of (R,G,B)-values.
clr.r                                      # Red value between 0.0-1.0.
clr.g                                      # Green value between 0.0-1.0.
clr.b                                      # Blue value between 0.0-1.0.
clr.a                                      # Alpha value between 0.0-1.0.
clr.map(base=1.0, colorspace=RGB)          # Returns a 4-tuple.
clr.blend(clr, t=0.5, colorspace=RGB)      # Returns a Color.
clr.rotate(angle)                          # Returns a Color.
clr.copy()                                 # Returns a copy of the color.
- Color.map() returns a 4-tuple of channel values mapped to the given base and colorspace.
For example: clr.map(255, HSB) yields a tuple of (H,S,B,A) values between 0-255. - Color.blend() returns a new color interpolated between two colors.
The t parameter defines the amount of each color (e.g. t=0.2 means 80% first color, 20% second).
Blending in the LAB colorspace avoids "muddy" colors but takes more time to calculate. - Color.rotate() returns a color with hue rotated on the RYB color wheel by the given angle.
Color state commands
The background(), fill() and stroke() commands set the current canvas background, shape fill and shape outline color respectively. All subsequently drawn primitives (e.g. lines, ellipses) will use the current fill and outline color. Each command takes the same parameters as a Color object (R,G,B,A | R,G,B | grayscale + alpha | Color). Each command also returns its current setting.
The strokewidth() command sets the width of the outline. It takes an integer value. Extra fine lines can be simulated by using a stroke width of 1 and a transparent stroke color.
background(r, g, b, a)
fill(r, g, b, a)
stroke(r, g, b, a)
nofill()
nostroke()
strokewidth(width=None)
strokestyle(style=None) # SOLID, DOTTED, DASHED.
Color filters
A color filter returns a new Color that is a variation on the given color, useful for constructing a set of colors that look pleasing together. The darker() and lighter() command modify the color's brightness in HSB, complement() returns the color that is opposite on the RYB color wheel, analog() returns a random adjacent color on the color wheel.
darker(clr, step=0.2) # Returns a Color.
lighter(clr, step=0.2) # Returns a Color.
complement(clr) # Returns a Color.
analog(clr, angle=20, d=0.1) # d = random saturation / brightness.
Color shapes
The colorplane() command draws a gradient rectangle that emits a different fill color from each corner.
An optional number of 2-4 colors can be given: top + bottom | top left + top right + bottom | top left + top right + bottom right + bottom left.
colorplane(x, y, width, height, clr1, clr2, clr3, clr4)
References: easyrgb.com
Transformation
The translate() command sets the current origin point for primitives, paths, images, text and layers. By default the origin is (0,0), which is the bottom left corner of the canvas. With translate(100,100), the current origin becomes (100,100). If translate(-50,0) is then called, the current origin becomes (50,100). In the same way, rotate(30) followed by rotate(60) sets the current rotation for all subsequent shapes to 90.
The push() and pop() commands create a branch in the current transformation state. The effect of translate(), rotate() and scale() after a push() only lasts until pop() is called. The reset() command resets all transformations (origin is (0,0), rotation is zero, scale is 100%).
translate(x, y) # Push horizontal and vertical offset.
rotate(degrees) # Push angle in degrees.
scale(x, y=None) # Push relative scale: 1.0 = 100%
push()
pop()
reset()
Primitives
Geometric primitives are the simplest shapes that can be drawn to the canvas: line, rectangle, triangle, ellipse, and two additional shapes, arrow and star.
 line |
 rect |
 triangle |
 ellipse |
arrow |
 star |
line(x0, y0, x1, y1)
rect(x, y, width, height)
triangle(x1, y1, x2, y2, x3, y3)
ellipse(x, y, width, height)
arrow(x, y, width)
star(x, y, points=20, outer=100, inner=50)
The star() command constructs a BezierPath object. By passing an optional parameter draw=False to the command this path is returned instead of drawn.
Drawn primitives will adhere to the current color and transformation state. The color state can be overridden by passing an optional fill, stroke, strokewidth, strokestyle to the command, for example:
from nodebox.graphics import *

def draw(canvas):
    canvas.clear()
    nofill()
    stroke(0, 0.25)
    strokewidth(1)
    rect( 50, 50, 50, 50)
    rect(110, 50, 50, 50, stroke=Color(0), strokestyle=DASHED)
    rect(170, 50, 50, 50)

canvas.run(draw)
Path
Path element
The PathElement object defines a single point in a BezierPath. Its cmd property defines the kind of segment from the previous point to this point: MOVETO, LINETO, CURVETO or CLOSE. For curve segments, the point has ctrl1 and ctrl2 properties that define the control handles of the curve:
- ctrl1 describes the direction and magnitude of the curve leaving the previous point,
- ctrl2 describes the direction and magnitude of the curve arriving in this point.
pt = PathElement(cmd=None, pts=None)
pt.cmd                                     # MOVETO, LINETO, CURVETO, CLOSE
pt.xy                                      # Tuple of (x,y)-values.
pt.x                                       # Horizontal offset.
pt.y                                       # Vertical offset.
pt.ctrl1.x                                 # For CURVETO:
pt.ctrl1.y                                 # curvature from previous point.
pt.ctrl2.x                                 # For CURVETO:
pt.ctrl2.y                                 # curvature ending in this point.
pt.copy() # Returns a copy of the point.
Path
The BezierPath object is a list of PathElement objects. The points in a path can easily be traversed in a for-loop. New points can be added to the path with the moveto(), lineto(), curveto() methods. Alternatively, findpath() returns a smooth BezierPath object constructed from a given list of (x,y)-tuples.
path = BezierPath(path=None)
path = findpath(points=[], curvature=1.0)
path.copy()
path.append(pathelement)
path.remove(pathelement)
path.moveto(x, y)
path.lineto(x, y)
path.curveto(x1, y1, x2, y2, x3, y3)
path.arcto(x, y, radius=1, clockwise=True, short=False)
path.closepath()
path.rect(x, y, width, height, roundness=0.0)
path.ellipse(x, y, width, height)
path.arc(x, y, width, height, start=0, stop=90)
path.length                                # Approximate length of the path.
path.contours                              # List of BezierPath contours.
path.bounds                                # Tuple of (x,y,width,height)-values.
path.contains(x, y, precision=100)         # Returns True if (x,y) in path.
path.addpoint(t)                           # Inserts PathElement at t (0.0-1.0).
path.points(amount=2, start=0.0, end=1.0)  # Iterator of PathElement objects.
path.point(t)                              # Returns PathElement at t.
path.angle(t)                              # Returns tangent angle at t.
path.flatten(precision=RELATIVE)
path.draw(precision=RELATIVE)
- BezierPath.points() and BezierPath.point() return DynamicPathElement objects.
These are dynamically calculated using linear interpolation math based on a given time t
(where t=0.0 is the start of the path and t=1.0 is the end of the path). - BezierPath.flatten() returns a list of contours, where each contour is a list of (x,y)-tuples.
- BezierPath.draw() draws the path to the canvas with a given precision for curves.
The precision determines the number of small, straight lines to represent a curve.
It can be a fixed number (int) or relative to the curve length (float or RELATIVE).
Optional parameters include fill, stroke, strokewidth and strokestyle.
Path state commands
The drawpath() command draws a BezierPath using the current color and transformation state. The color state can be overridden by passing an optional fill, stroke, strokewidth and/or strokestyle to the command.
Consistent with NodeBox for Mac OS X, beginpath() starts a new path at (x,y). Points can be added to it with moveto(), lineto(), curveto(), until endpath() is called and the path is drawn/returned. Regardless of whether you use BezierPath directly or work with beginpath(), the efficient way is to create a path outside of the animation loop, and leave it unmodified to take advantage of caching mechanisms (GLU tessellation + OpenGL Display List).
autoclosepath(close=False)
beginpath(x, y)
moveto(x, y)
lineto(x, y)
curveto(x1, y1, x2, y2, x3, y3)
closepath()
endpath(draw=True) # Returns a BezierPath.
drawpath(path)
Path iterator
The directed() command is an iterator that yields (angle, point)-tuples for the given "list of points" (a BezierPath, the return value from BezierPath.points() or a list of PathElement objects). For each (angle, point)-tuple, the angle represents the direction of this point on the path. To get the normal (i.e. perpendicular) of the point, rotate the angle by +90 or -90.
directed(points)
This is useful if you want to have shapes following a path, for example, to fit text on a path:
from nodebox.graphics import *

path = BezierPath()
path.moveto(100, 50)
path.curveto(200, 100, 300, 0, 400, 50)

txt = "NodeBox for OpenGL" # Create a Text object for each character.
glyphs = [Text(char, fontname="Droid Sans Mono") for char in txt]

def draw(canvas):
    background(1)
    fill(0)
    points = path.points(amount=len(glyphs), start=0.05, end=0.95)
    for i, (angle, pt) in enumerate(directed(points)):
        push()
        translate(pt.x, pt.y)
        rotate(angle)
        text(glyphs[i], x=-textwidth(glyphs[i])/2)
        pop()
    drawpath(path, fill=None, stroke=(0,0,0,0.5))

canvas.size = 600, 150
canvas.run(draw)

Supershape
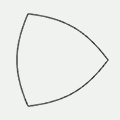
The supershape() command can be used to generate a range of natural-looking shapes (Gielis, 2003).
It returns a BezierPath, which can be drawn with drawpath().
 m=3, n1=1.0, n2=1.0, n3=1.0 |
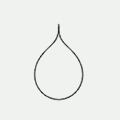 m=1, n1=0.65, n2=0.35, n3=0.35 |
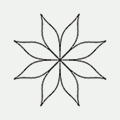 m=16, n1=1.5, n2=0.5, n3=-0.75 |
supershape(x, y, width, height, m, n1, n2, n3, points=100, percentage=1.0, range=2*pi)
Clipping mask
Drawing commands between beginclip() and endclip() are constrained to the shape of the given path.
beginclip(path)
endclip()
Image
The image() command draws an image to the canvas. It can load anything from a file path to an Image, Pixels or Texture object. However, the most efficient way is to create an Image object before the animation starts and reuse it (the image texture will be cached along with an OpenGL Display List):
from nodebox.graphics import *

beetle = Image("g/beetle.png")

def draw(canvas):
    canvas.clear()
    image(beetle, x=100, y=100)

canvas.run(draw)
The Image object can be used to load an image from file. Optionally, it will be rescaled to the given width and height. An image can also be loaded as a byte string (e.g. a download from the internet) by setting path to None and data to the byte string.
img = Image(path, x=0, y=0, width=None, height=None, data=None)
img.xy                                     # Tuple of (x,y)-values.
img.x                                      # Horizontal offset.
img.y                                      # Vertical offset.
img.width                                  # Image width in pixels.
img.height                                 # Image height in pixels.
img.size                                   # Tuple of (width,height)-values.
img.color                                  # Default: Color(1.0).
img.alpha                                  # Default: 1.0.
img.texture                                # Texture object.
img.quad                                   # Quad object.
img.copy(texture=None, width=None, height=None)
img.save(path)
img.adjust(r=1.0, g=1.0, b=1.0, a=1.0)
img.distort(dx1=0, dy1=0, dx2=0, dy2=0, dx3=0, dy3=0, dx4=0, dy4=0)
img.draw(
       x = None,
       y = None,
   width = None,
  height = None,
   alpha = None,
   color = None,
  filter = None)
Image state commands
The image() command draws an image to the screen. It can load an image file path, a Texture, Image, or Pixels object, or a byte string passed to the data parameter. The most efficient way is to to create an Image object before the animation starts and reuse it. If optional parameters are given, they will take precedence over any property in the Image. The optional alpha is the image's opacity as a value between 0.0-1.0. The optional color is a Color or a (R,G,B,A)-tuple used to colorize the image pixels.
image(img,
       x = None,
       y = None,
   width = None,
  height = None,
   alpha = None,
   color = None,
  filter = None,
    data = None)
The imagesize() command returns a (width,height)-tuple with the image dimensions.
The crop() command returns a rectangular portion of the image as a new Image.
imagesize(img)
crop(img, x=0, y=0, width=None, height=None)
Image quad distortion
Drawing an image involves two steps: (1) creating a texture from an image file, and (2) "mounting" the texture on a shape. This shape is a quadrilateral (four sides) of which the vertices do not necessarily have a straight angle – i.e. the corners can be distorted with the Image.quad property. The image will have to be re-cached when this happens, making quad distortion in real-time quite slow.
quad = Quad(dx1=0, dy1=0, dx2=0, dy2=0, dx3=0, dy3=0, dx4=0, dy4=0)
quad.copy()
quad.reset()
quad.dx1                                   # Top left, horizontal offset.
quad.dy1                                   # Top left, vertical offset.
quad.dx2                                   # Top right, horizontal offset.
quad.dy2                                   # Top right, vertical offset.
quad.dx3                                   # Bottom right, horizontal offset.
quad.dy3                                   # Bottom right, vertical offset.
quad.dx4                                   # Bottom left, horizontal offset.
quad.dy4                                   # Bottom left, vertical offset.
Alternatively, the Image.distort() method can be used.
Image pixels
The Pixels object can be used to retrieve a list of color values (0-255) for each pixel in an image. Values can be modified, after which Pixels.update() must be called to reflect the changes (this is a costly operation). A Pixels object can be passed to the image() command to draw it to the canvas.
pixels = Pixels(img)
pixels.width                               # Image width in pixels.
pixels.height                              # Image height in pixels.
pixels.size                                # Tuple of (width,height)-values.
pixels[i]                                  # Tuple of (R,G,B,A)-values.
pixels.texture
pixels.get(i,j)                            # Returns a Color.
pixels.set(i,j, clr)
pixels.map(function)
pixels.update()
pixels.copy()
- Pixels.map() applies a function to each pixel. Function takes (and must return) an (R,G,B,A)-tuple.
- Pixels.get() returns the pixel at row i, column j as a Color object.
- Pixels.set() sets the pixel at row i, column j from a Color object.
These methods are safer and more convenient than simply indexing the list (which contains tuples of values between 0-255), but they are also more costly operations because Color objects are constructed.
Image animation
The Animation object can be used to create a "movie loop" from a list of Image frames. The duration specifies the time for the entire animation to run.
Animations are useful to cache effects such as physics (e.g. an explosion) that have been prepared with an OffscreenBuffer. Playing a movie loop is usually faster than redoing the physics math.
animation = Animation(images=[], duration=None, loop=False)
animation.frames                           # List of Image objects.
animation.frame                            # Current Image frame.
animation.done                             # True => the animation has stopped.
animation.update()                         # Skip to the next frame to play.
animation.draw()
animation.copy()
Image filters
The render() command returns an Image from a function containing drawing commands – i.e. a procedural image. This is useful if for example you need to render a blur effect on a BezierPath or Text. Rendering is done in an OffscreenBuffer. The previous contents of this buffer are cleared when the width or height of the buffer changes or when clear=True. This is the default behavior, but in some situations it can be useful to set clear=False to draw cumulatively on top of the previous render() call.
The filter() command returns a new Image with the given Filter applied. This is generally only useful if you have created custom filters.
render(function, width, height, clear=True)
filter(img, filter=None, clear=True)
A range of easy-to-use filters is available, building on render() and filter(). For example:
 normal |
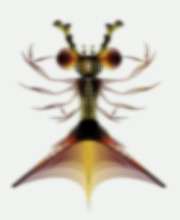 blurred |
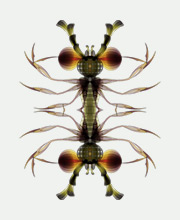 mirrored
|
Image filters | generators
The solid() command returns an Image with a solid fill color.
The gradient() command returns an Image with a gradient fill (either LINEAR or RADIAL).
solid(width, height, fill=Color(0,0))
gradient(width, height, clr1=Color(0), clr2=Color(1), type=LINEAR)
Image filters | color
A color filter returns a new Image with modified pixels.
- invert() swaps all the color channels (e.g. black becomes white).
- colorize() multiplies the R,G,B,A channels with color and adds bias.
- adjust() modifies the image brightness, contrast, and/or hue.
- desaturate() returns a grayscale image.
- brightpass() makes pixels whose luminance falls below the threshold black.
- blur() returns a blurred image, where kernel defines the size of the convolution matrix (3x3 | 5x5 | 9x9), scale the radius of the effect (higher scale = rougher + faster blur) and amount the number of the times to apply the blur. Setting an amount produces a nicer effect than repeatedly using blur() in a for-loop.
- dropshadow() returns a blurred grayscale image, with Image.color set to (0,0,0,1).
If filters are not supported, returns a grayscale version without the blur.
invert(img)
colorize(img, color=(1,1,1,1), bias=(0,0,0,0))
adjust(img, brightness=1.0, contrast=1.0, saturation=1.0, hue=0.0)
desaturate(img)
brightpass(img, threshold=0.3)
blur(img, kernel=9, scale=1.0, amount=1, cumulative=False)
dropshadow(img, alpha=0.5, amount=2)
Image filters | alpha compositing
An alpha compositing filter returns a new Image that blends the pixels of the two given images.
- transparent() applies a solid alpha channel to the image.
- mask() applies img2 as alpha channel to img1, where img2 is a grayscale image (e.g. with desaturate()). The black areas make the first image transparent (e.g. punch holes in it).
- blend() mixes the pixels using a set of math formulas, comparable to blend modes in Photoshop:
| Mode | Effect |
| ADD | Pixels are added. |
| SUBTRACT | Pixels are subtracted. |
| LIGHTEN | Lightest value for each pixel. |
| DARKEN | Darkest value for each pixel. |
| MULTIPLY | Pixels are multiplied, resulting in a darker image. |
| SCREEN | Pixels are inverted-multiplied-inverted, resulting in a brighter picture. |
| OVERLAY | Combines multiply and screen: light parts become ligher, dark parts darker. |
| HARDLIGHT | Like overlay, but uses the blend image's luminance. |
| HUE | Hue from the blend image, brightness and saturation from the base image. |
transparent(img, alpha=1.0)
mask(img1, img2, alpha=1.0, dx=0, dy=0)
blend(img1, img2, mode=OVERLAY, alpha=1.0, dx=0, dy=0)
Each blend mode is also available as a separate command:
add(img1, img2, alpha=1.0, dx=0, dy=0)
subtract(img1, img2, alpha=1.0, dx=0, dy=0)
lighten(img1, img2, alpha=1.0, dx=0, dy=0)
darken(img1, img2, alpha=1.0, dx=0, dy=0)
multiply(img1, img2, alpha=1.0, dx=0, dy=0)
screen(img1, img2, alpha=1.0, dx=0, dy=0)
overlay(img1, img2, alpha=1.0, dx=0, dy=0)
hardlight(img1, img2, alpha=1.0, dx=0, dy=0)
hue(img1, img2, alpha=1.0, dx=0, dy=0)
The dx and dy parameters define the offset in pixels of img2 from the bottom-left of img1.
Image filters | distortion
A distortion filter returns a new Image where the pixels from the given image are transformed (e.g. rotated). The dx and dy parameters define the relative origin of the effect (default = image center). The radius parameter defines the extent of the effect, where 1.0 means that it encompasses the entire image. The zoom parameter defines the intensity of the effect, usually as a number between 0.0-1.0 (or 0.0-2.0 for stretch()).
bump(img, dx=0.5, dy=0.5, radius=0.5, zoom=0.5)
dent(img, dx=0.5, dy=0.5, radius=0.5, zoom=0.5)
pinch(img, dx=0.5, dy=0.5, zoom=0.75)
twirl(img, dx=0.5, dy=0.5, radius=1.0, angle=180.0)
splash(img, dx=0.5, dy=0.5, radius=0.5)
stretch(img, dx=0.5, dy=0.5, radius=0.5, zoom=1.0)
mirror(img, dx=0.5, dy=0.5, horizontal=True, vertical=True)
Image filters | light
A light filter returns a new Image with fringes of light around bright objects in the image (e.g. "magic glow").
- glow() uses a combination of blur() and add().
- bloom() is slower, using a combination of brightpass(), blur() and glow().
The amount parameter defines the number of times to blur.
Pixels whose luminance falls below the given threshold produce no glow.
glow(img, intensity=0.5, amount=1)
bloom(img, intensity=0.5, amount=1, threshold=0.3)
Live filters
These commands do not return an Image. Instead, they can be passed to the optional filter parameter of the image() command. The advantage is that it is fast because no OffscreenBuffer is involved behind the scenes – the image is directly drawn with the effect (instead of rendered into a new texture) so everything happens in GPU. The drawback is that the image() command's color and alpha parameters won't work because the filter overrides them.
inverted()
colorized(color=(1,1,1,1), bias=(0,0,0,0))
adjusted(mode, v) # mode = BRIGHTNESS, CONTRAST, SATURATION, HUE
desaturated()
blurred(scale=1.0)
masked(img, alpha=1.0, dx=0, dy=0)
blended(mode, img, alpha=1.0, dx=0, dy=0) # mode = MULTIPLY, SCREEN, ...
distorted(type, dx=0.5, dy=0.5, **kwargs) # type = BUMP, DENT, TWIRL, ...
- blurred() uses a simple Gaussian 3x3 kernel; higher would negate performance gain over blur().
- distorted() takes optional radius, zoom, angle, horizontal and vertical parameters.
The **kwargs is just the Pythonic way of saying that a function takes optional parameters.
For example:
image("beetle.png", filter=distorted(PINCH, zoom=0.25))
Live filters (with the exception of blended()) will also work on older hardware (e.g. OpenGL 1.5) when used with images that do not contain transparency.
References: mouaif.org (2009), gamerendering.com (2008), dem.ocracy.org (2007)
Text
The Text object prepares a formatted string of text that can be drawn at a given position. The most efficient way is to create a Text object before the animation starts and reuse it (the character glyphs are cached along with an OpenGL Vertex Array). If a width is given, text will span multiple lines if it exceeds the width. Optional parameters include: fontname, fontsize, fontweight, lineheight, align, fill.
txt = Text(str, x=0, y=0, width=None, height=None)
txt.xy                                     # Tuple of (x,y)-values.
txt.x                                      # Horizontal offset.
txt.y                                      # Vertical offset.
txt.width                                  # Text block width.
txt.height                                 # Text block height.
txt.size                                   # Tuple of (width, height)-values.
txt.mettrics                               # Tuple of (width, height)-values.
txt.text                                   # Text string, e.g. "Hello world".
txt.fontname                               # Default: "Droid Sans".
txt.fontsize                               # Default: 12
txt.fontweight                             # NORMAL, BOLD, ITALIC.
txt.lineheight                             # Default: 1.2
txt.align                                  # LEFT, RIGHT, CENTER.
txt.fill                                   # A Color.
txt.draw(x=None, y=None)
txt.style(i, j, property1, property2, ...)
txt.copy()
- Text.size yields the dimensions of the text block.
- Text.metrics yields the dimensions of the text content.
- Text.style() can be used to format portions of the string (starting at index i and ending at index j). Valid arguments include: fontname, fontsize, fontweight, lineheight, align, fill.
For example:
txt = Text("Hello world!", fontname="Droid Sans")
txt.style(5, 11, fontweight=BOLD, fill=Color(1,0,0))
Text state commands
Consistent with NodeBox for Mac OS X, font(), lineheight() and align() set the current text state. The difference is that, whereas the OS X version of font() takes the PostScript font name (e.g. "DroidSerif-Bold"), here we use the font family name ("Droid Serif") and define the weight separately:
font("Droid Serif", fontweight=BOLD).
font(fontname=None, fontsize=None, fontweight=None, file=None)
fontname(name=None)
fontsize(size=None)
fontweight() # NORMAL, BOLD, ITALIC, (BOLD,ITALIC)
lineheight(size=None)
align(mode=None) # LEFT, RIGHT, CENTER
The text() command draws a string using the current color, transformation and text state. The state can be overridden by passing an optional fill, fontname, fontsize , fontweight, lineheight and/or align to the command. However, it is faster to create a Text object before the animation starts and pass this to text() instead of a string. In this case the current text state is ignored (Text properties override it).
text(str, x=None, y=None, width=None, height=None, draw=True)
textwidth(txt) # Returns the text content width.
textheight(txt, width=None) # Returns the text content height.
textmetrics(txt, width=None) # Returns a (width,height)-tuple.
Text to path
The textpath() command returns a BezierPath from the given text string. This will only work with ASCII characters and the default fonts (Droid Sans, Droid Sans Mono, Droid Serif, Arial). The fontname, fontsize and fontweight can be given as optional parameters, but width, height, lineheight and align are ignored. See /nodebox/font/glyph.py how to activate other fonts.
textpath(string, x=0, y=0, fontname=None, fontsize=None, fontweight=None)
Utility commands
The random() command returns a number between v1 and v2, including v1 but not v2.
The bias (0.0-1.0) represents preference towards lower or higher numbers.
The noise() command returns a smooth value between -1.0 and 1.0.
Smaller successive x, y, z steps (e.g. 0.005-0.1) yield a smoother noise "landscape".
The grid() command is an iterator that yields (x,y)-tuples for the given number of rows and columns.
The space between each point is determined by colwidth and colheight.
The files() command returns a list of filenames found at the given path.
The contents of a file can be obtained with open(filename).read().
random(v1=1.0, v2=None, bias=None)
noise(x, y=0, z=0)
grid(cols, rows, colwidth=1, rowheight=1, shuffled=False)
files(path="*")
Layer
The Layer object can be used to group shapes, paths, texts and images. A layer can be transformed and modified without affecting other layers. Multiple layers can be stacked in a specific order (the order in which they are added to the canvas with Canvas.append()). Each frame, the canvas will call Layer.draw() and propagate events to the layer if it has enabled set to True.
A layer can contain child layers that transform relative to the parent. For example: an insect's body can be drawn in a layer, with each of its legs drawn in a child layer. When the body rotates, the legs rotate with it, but they can still be manipulated separately (e.g. to make them scuttle or grasp an object).
layer = Layer(
         x = 0,
         y = 0,
     width = None,
    height = None,
    origin = (0,0),
     scale = 1.0,
  rotation = 0,
   opacity = 1.0,
  duration = 0.0,
      name = None,
    parent = None)
layer = Layer.from_image(img, x=0, y=0, ...)
layer = Layer.from_function(function, x=0, y=0, ...)
layer.name                                 # A (unique) string, default=None.
layer.canvas                               # Canvas this layer is drawn to.
layer.parent                               # Layer this layer is child of.
layer.layers                               # List of child Layer objects.
layer.[child_name]                         # Child Layer object with given name.
layer.xy                                   # Tuple of (x,y)-values.
layer.x                                    # Horizontal offset.
layer.y                                    # Vertical offset.
layer.width                                # Layer width in pixels.
layer.height                               # Layer height in pixels.
layer.bounds                               # Tuple of (x,y,width,height)-values.
layer.absolute_origin                      # Absolute origin as (x,y)-tuple.
layer.relative_origin                      # Relative origin as (x,y)-tuple.
layer.scaling                              # Relative scale (e.g. 0.0-1.0).
layer.rotation                             # Rotation in degrees.
layer.opacity                              # Alpha opacity between 0.0-1.0.
layer.duration                             # Motion tweening time in seconds.
layer.done                                 # Motion tweening has finished?
layer.hidden                               # True => draw the layer.
layer.top                                  # True => draw over parent.
layer.flipped                              # True => mirror horizontally.
layer.clipped                              # True => clip children to bounds.
layer.transform # geometry.AffineTransform object.
layer.translate(x, y)
layer.rotate(angle)
layer.scale(f)
layer.flip()
layer.copy(parent=None, canvas=None)
layer.append(layer)
layer.update()                             # Override in a subclass.
layer.draw()                               # Override in a subclass.
layer.render() # Returns an Image.
layer.absolute_position()
layer.contains(x, y)
layer.layer_at(x, y, clipped=False, enabled=False)
layer.traverse(visit=lambda layer: None)
- Layer.translate(), Layer.rotate(), Layer.scale() and Layer.flip() transform the layer.
Layers will otherwise ignore the canvas transformation state.
Transformations originate from the layer's origin, e.g. relative (0.5,o.5) = layer center.
Transformations take Layer.duration seconds to complete (smooth motion tweening). - Layer.copy() returns a new Layer containing copies of all the child layers.
- Layer.draw() and Layer.update() are called each frame and must be overridden in a subclass.
- Layer.absolute_position() gives the absolute location (x,y) on the canvas.
This is useful for child layers, whose Layer.x and Layer.y are relative to the parent layer. - Layer.layer_at() returns the (visible) child layer (or None) that contains the given position.
With clipped=True, no parts of child layers outside the parent's bounds are checked.
With enabled=True, only enabled layers are checked (useful for events).
Layers and None
Layer.layer_at() returns either a Layer or None. Since Layer is a subclass of list, the expression if layer: ... calls len(layer). Layers without children therefore evaluate to 0, which is False. Therefore you should always use an explicit if layer is not None: ... expression.
Layer events
The canvas fires events when input from the mouse or keyboard is detected. This happens before the current frame is drawn. Events will be passed on to layers that have been appended to the canvas and have enabled set to True. When the mouse moves over a layer, this layer will have its focus property set to True and the layer will be set as the value for Canvas.focus. The event methods are meant to be overridden in a subclass of Layer.
layer.enabled                              # True => will receive events.
layer.pressed                              # True => mouse pressed on layer.
layer.dragged                              # True => mouse dragged on layer.
layer.focus                                # True => mouse hovering over layer.
layer.on_mouse_enter(mouse)
layer.on_mouse_leave(mouse)
layer.on_mouse_motion(mouse)
layer.on_mouse_press(mouse)
layer.on_mouse_release(mouse)
layer.on_mouse_drag(mouse)
layer.on_mouse_scroll(mouse)
layer.on_key_press(keys)
layer.on_key_release(keys)
Layer bounds
The layer bounds is the rectangular area between (x, y, x+width, y+height) that triggers mouse events. Child layers and content in the Layer.draw() method are allowed to overflow the edges of the bounds, unless Layer.clipped is explicitly set to True (in which case all content is cut off at the bounding edge).
A layer does not necessarily require a defined width and height. When omitted, the layer is regarded as spanning "infinitely" across the canvas. It will trigger events all across the canvas. In this case it should not have a relative origin however, i.e. a (float, float)-tuple passed to the origin parameter of the Layer constructor. What is 0.5 of infinity? Infinite layers should always use an absolute origin point.
Prototype-based inheritance
A layer is only useful if it subclassed with an implemented Layer.draw() method and / or event handlers.
Since Layer inherits from a Prototype base class, it is also possible to patch methods dynamically:
prototype.set_method(function, name=None)
prototype.set_property(key, value)
- Prototype.set_method() dynamically attaches a function as a method to the object.
- Prototype.set_property() can be used to dynamically add a new property to the object.
In the two examples below we compare subclassing to prototype-based inheritance:
from nodebox.graphics import *

class Button(Layer):
    def __init__(self, *args, **kwargs):
        Layer.__init__(self, *args, **kwargs)
        self.clr = Color(random())
    def draw(self):
        rect(0, 0, self.width, self.height, fill=self.clr)
    def on_mouse_press(self, mouse):
        self.clr = Color(random())
    def copy(self):
        button = Layer.copy(self)
        button.clr = self.clr.copy()
        return button

canvas.append(Button(0, 0, 100, 100))
canvas.run()
This is exactly the same as:
from nodebox.graphics import *

def button_draw(layer):
    rect(0, 0, layer.width, layer.height, fill=layer.clr)
def button_on_mouse_press(layer, mouse):
    layer.clr = Color(random())

button = Layer(0, 0, 100, 100)
button.set_property("clr", Color(random()))
button.set_method(button_draw, name="draw")
button.set_method(button_on_mouse_press, name="on_mouse_press")

canvas.append(button)
canvas.run()
Both examples even have about the same amount of code, so what's the gain? The difference lies in the way both are copied. The subclass requires a new copy() method to correctly copy the additional properties in the subclass – Layer.copy() will of course only copy layer properties. The prototype-based approach takes care of this automatically.
Subclassing is advised when you are developing a framework of classes that in turn will be used by others.
For sketches and hacking, the prototype-based approach may be quicker.
Group layer
Group is a subclass of Layer that simply serves as a container for other layers.
It doesn't draw anything and it has a width and a height of 0.
Mouse & keyboard
Mouse
The mouse object stores the current state of the mouse input device. It can be retrieved with the canvas.mouse property in the main draw() loop and it is passed as a parameter to the mouse event handlers, e.g. Layer.on_mouse_motion().
mouse = canvas.mouse
mouse.x                             # Horizontal position.
mouse.y                             # Vertical position.
mouse.relative_x                    # Relative (0.0-1.0) to Canvas.width.
mouse.relative_y                    # Relative (0.0-1.0) to Canvas.height.
mouse.dx                            # Drag distance from previous x.
mouse.dy                            # Drag distance from previous y.
mouse.scroll                        # Scrollwheel offset.
mouse.pressed                       # True if the mouse button is pressed.
mouse.dragged                       # True if the mouse is dragged.
mouse.cursor                        # DEFAULT, CROSS, HAND, HIDDEN, TEXT, WAIT
mouse.button                        # LEFT, RIGHT, MIDDLE
mouse.modifiers                     # List of: CTRL, SHIFT, OPTION
Keyboard
The keys object stores the current state of the keyboard input device. It can be retrieved with the canvas.keys property in the main draw() loop and it is passed as a parameter to the keyboard event handlers, e.g. Layer.on_key_press(). It is a list of keys currently pressed, with some additional properties:
keys = canvas.keys
keys[]          # All keys pressed (SHIFT + "a" => [SHIFT, "a"]).
keys.char       # Last key pressed (SHIFT + "a" => "A").
keys.code       # Last key pressed (SHIFT + "a" => "a").
keys.modifiers  # List of modifier keys (CTRL, SHIFT, OPTION).
keys.pressed    # True if a key is pressed on the keyboard.
Keys.code constants include: BACKSPACE, TAB, ENTER, SPACE, ESCAPE, UP, DOWN, LEFT, RIGHT.
Canvas
The Canvas object opens an application window containing the drawing canvas when Canvas.run() is called. It is a list of Layer objects whose draw() method will be called each animation frame. It is also possible to draw directly to the canvas by overriding the Canvas.draw() method, or by passing a custom draw() function to the Canvas.run() method:
from nodebox.graphics import *

def draw(canvas):
    canvas.clear() # Clear previous frame.
    translate(250, 250)
    rotate(canvas.frame)
    rect(-100, -100, 200, 200)

canvas.size = 500, 500
canvas.run(draw)
There is no explicit need to initialize a new Canvas object in your script. One has already been created with the best hardware configuration for your system, and stored in a global variable named canvas.
canvas = Canvas(width=640, height=480, name="NodeBox for OpenGL", resizable=False)
canvas.name                         # Window title.
canvas.layers                       # List of Layer objects.
canvas.append(layer)
canvas.xy                           # Tuple of (x,y)-values.
canvas.x                            # Window position from left.
canvas.y                            # Window position from top.
canvas.width                        # Window width.
canvas.height                       # Window height.
canvas.size                         # Tuple of (width,height)-values.
canvas.fullscreen                   # When True, runs in fullscreen.
canvas.screen                       # Screen size: screen.width & screen.height
canvas.fps                          # Frames per second.
canvas.frame                        # Current animation frame (start = 1).
canvas.elapsed                      # Elapsed time since last frame.
canvas.mouse                        # Mouse object
canvas.keys                         # Keys object.
canvas.focus                        # None, or Layer over which mouse hovers.
canvas.setup()
canvas.update()
canvas.draw()
canvas.clear()
canvas.run(draw=None, setup=None, update=None, stop=None)
canvas.stop()
canvas.active                       # True when application is running.
canvas.layer_at(x, y, clipped=False, enabled=False)
canvas.texture
canvas.save(path)
- Canvas.setup() is meant to be overridden. It runs once at the start of the animation.
Canvas.update() is meant to be overridden. It runs each frame, before draw().
Canvas.draw() is meant be overridden. It runs each frame.
Instead of overriding, you can also pass functions to run(). - Canvas.layer_at() returns the topmost (visible) Layer at the given (x,y) position.
With clipped=True, no parts of child layers outside the parent's bounds are checked.
With enabled=True, only enabled layers are checked.
Canvas events
Canvas event handlers are fired when input from the mouse or keyboard is detected. For example, if the mouse is moved over the canvas, Canvas.on_mouse_motion() is called. This happens before the current frame is drawn. Events will be passed on to layers that have been appended to the canvas. When the mouse moves over a layer, this layer will have its focus property set to True and the layer will be set as the value for Canvas.focus.
canvas.on_mouse_enter(mouse)
canvas.on_mouse_leave(mouse)
canvas.on_mouse_motion(mouse)
canvas.on_mouse_press(mouse)
canvas.on_mouse_release(mouse)
canvas.on_mouse_drag(mouse)
canvas.on_mouse_scroll(mouse)
canvas.on_key_press(keys)
canvas.on_key_release(keys)
canvas.on_move()
canvas.on_resize()
The easiest way to set an event handler is to assign your own function that accepts Canvas and Mouse as parameters:
def on_mouse_drag(canvas, mouse):
    print "mouse is dragged!"

canvas.on_mouse_drag = on_mouse_drag
Since events are fired before canvas.draw(), no drawing can occur in an event handler. Another way to handle events is to check the mouse and keyboard inside the main draw() function (this is less tidy):
def draw(canvas):
    if canvas.mouse.dragged:
        print "mouse is dragged!"

canvas.run(draw)
The default Canvas.on_key_press() handler responds to the following key combinations:
| Keys | Event |
| ESC | Stops the animation and closes the window. |
| CTRL+P | Pauses the animation, until CTRL+P is pressed again. |
| CTRL+S | Saves a PNG-screenshot of the canvas in the current folder. |
Canvas profiler
The canvas.profiler.framerate yields the approximate frames per second of the animation.
The canvas.profiler.run() method can be called instead of canvas.run(). It executes a number of frames of animation and returns a string with performance statistics, listing the top functions that take up a lot of time, sorted by SLOWEST or CUMULATIVE.
canvas.profiler.framerate
canvas.profiler.run(draw=None, setup=None, update=None,
  frames = 100,
    sort = CUMULATIVE,
     top = 30)
